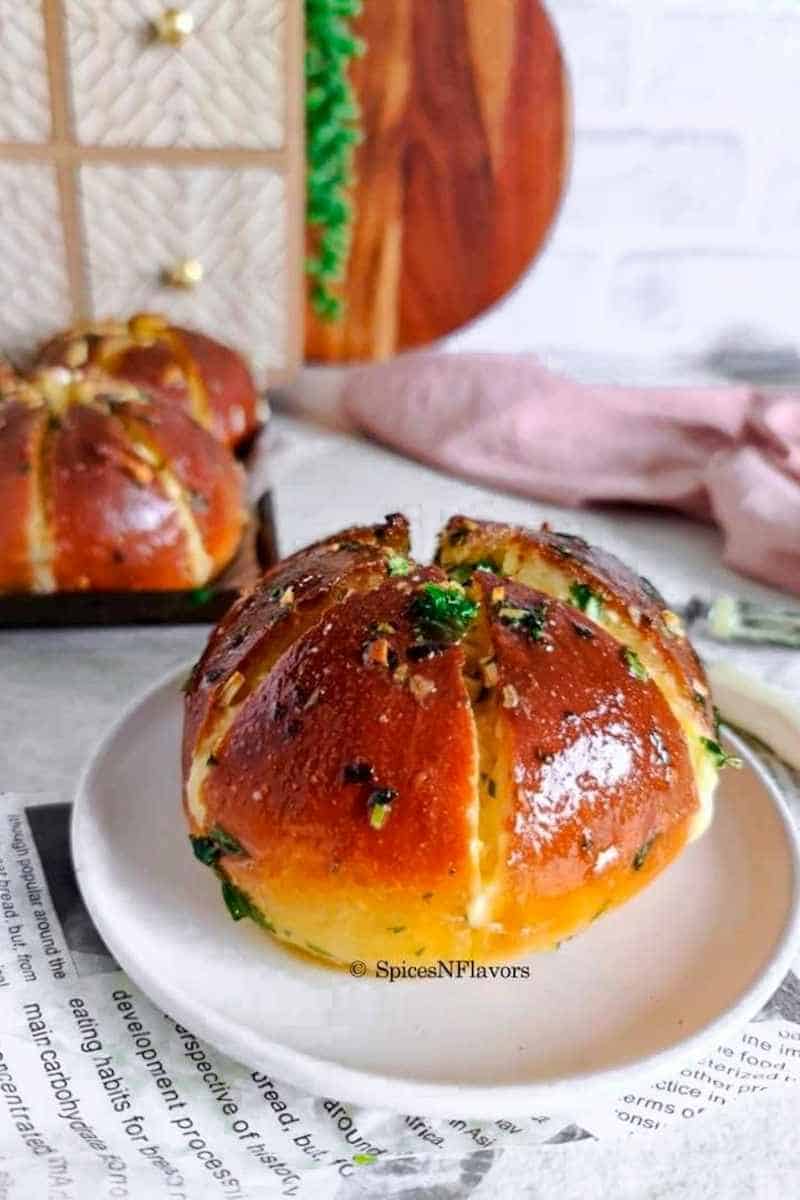
A classic Garlic Bread is made using a baguette that is then brushed with a garlic butter spread often flavoured with salt and fresh herbs. This Korean Cream Cheese Garlic Bread on the other hand is a classic twist to the regular garlic bread which incorporates an additional sweetened cream cheese filling and is made in a burger bun-shaped bread. No wonder it is such a famous street food recipe.
Bun Ingredients
-
25 ml (1/2 cup) Milk
-
60 gms (1/4 cup) Yogurt
-
30 gms (2 tbsp) Sugar
-
6 gms (1.5 tsp) Instant Yeast
-
240 gms (2 cups) Bread Flour
-
15 gms (2 tbsp) Milk Powder
-
1 tsp Salt
-
20 gms Unsalted Butter
-
Sweetened Cream Cheese filling
Garlic Butter Sauce
-
50 gms (1/4 cup) Milk
-
1 tbsp Cornflour
-
113 gms (1/2 cup) Unsalted Butter melted
-
30 gms (1.5 tbsp) Condensed Milk
-
20 gms (1 tbsp) Honey
-
30 gms Chopped Garlic
-
5 gms Coriander leaves or Parsley
-
1/4 tsp Salt
Step 1 – Prepare the Korean Garlic Bun
-
Dump all the ingredients in a bowl starting with milk and yogurt. Give a gentle mix and add the dry ingredients starting with sugar, yeast, flour, milk powder and salt.
-
Combine to form a shaggy mass of dough. Transfer to your worktop and knead for 5 mins. Then incorporate the softened butter and knead until you get a soft and elastic dough. It took me around 20 mins to reach this stage. You can also try the window pane method to confirm.
-
If using a stand mixer add all the ingredients except for butter. Knead on med to high speed for 6 mins, then add the softened butter and knead again for another 8 mins.
-
Lightly oil the same bowl in which you kneaded the dough, place the dough into it, cling wrap and allow for first proofing which is 1.5 hours. You can cut the time to 45 mins if proofing in the Instant Pot.
-
To proof in the Instant Pot place the dough in the oiled inner pot. Choose the Yogurt mode and set the time to 45 mins.
-
Once proofed, punch down the dough to remove any gases, transfer to your worktop and knead for another minute.
-
Divide the dough into 4 equal parts.
-
Take each part and shape to form a tight roundel by first tucking the sides to the centre and then pushing the dough with your thumb and forefingers.
-
Place the shaped dough onto a baking tray lined with parchment paper, loosely cover it with a tea towel and proof again for 30 mins.
-
Once proofed bake in the pre-heated oven at 180°C for 20 mins or until the top is golden brown and the bottom of the bread sounds hollow when tapped.
-
Once baked brush the top with some butter to soften the crust. Transfer to a wire rack to cool completely.
-
Alternatively, you can also bake the buns in an air fryer at 180°C for 10-12 mins. Do remember to preheat the air fryer for 3 mins.
Step 2 – Cream Cheese Filling
-
In a bowl, whisk the softened cream cheese until smooth and creamy.
-
Add the whipping cream and icing sugar and beat until stiff peaks form.
-
Transfer to a piping bag and set aside.
Step 3 – Garlic Butter Custard Sauce
-
In a saucepan mix the milk and cornflour until the cornflour dissolves. Then cook them together on med flame until it forms a sauce-like consistency. Transfer to a separate bowl to cool completely.
-
To a separate bowl, add the melted butter, now cooled cornflour slurry, condensed milk, honey, chopped garlic, chopped coriander leaves and salt. Mix everything until it is homogenous.
Step 4 – Assembling the Korean Garlic Bread
-
Make 3 cuts on the bread bun to form 6 wedges keeping the base of the bread intact.
-
Pipe the prepared cream cheese filling on each side.
-
Then take the entire bun and dunk it upside down onto the garlic butter custard sauce to coat the bread well. Turn it to the right position and spoon some extra sauce in between the slices and also on top of the bread.
-
Place it on a baking tray lined with parchment paper. Repeat with the other 3 bread buns too.
-
Bake in a preheated oven of 200°C for 10-12 mins or until the crust becomes crispy and the inside remains gooey and cheesy.
-
Alternatively, you can also crisp up the bread bun in your air-fryer at 200°C for 5 to 8 mins. Remember to pre-heat the air fryer for 3 mins at 200°C before placing the buns.
-
Enjoy warm.
Source: spicesnflavors.com
Reader's opinions